
How to print a QR code: Size, quality, and format guide
Printing a QR code seems simple, just hit print, right? Not quite. Poor printing can make a working code unscannablke. Bad resolution, wrong size, or low contrast kills it. Good printing makes it scan perfectly. This guide covers exactly what you need to know.
Why print quality matters for QR codes
QR codes are read optically. Your phone's camera has to see the black and white pattern clearly. If the pattern is blurry, pixelated, smudged, or faint, scanning fails. Every detail matters:
- Pixelation: Low-resolution prints create jagged edges. Scanners can't read them smoothly
- Smudging: Poor ink transfer creates blurry lines. Cameras struggle to focus
- Low contrast: If the code isn't dark enough against its background, phones can't read it
- Too small: A code that's too tiny can't be focused on or scanned from a reasonable distance
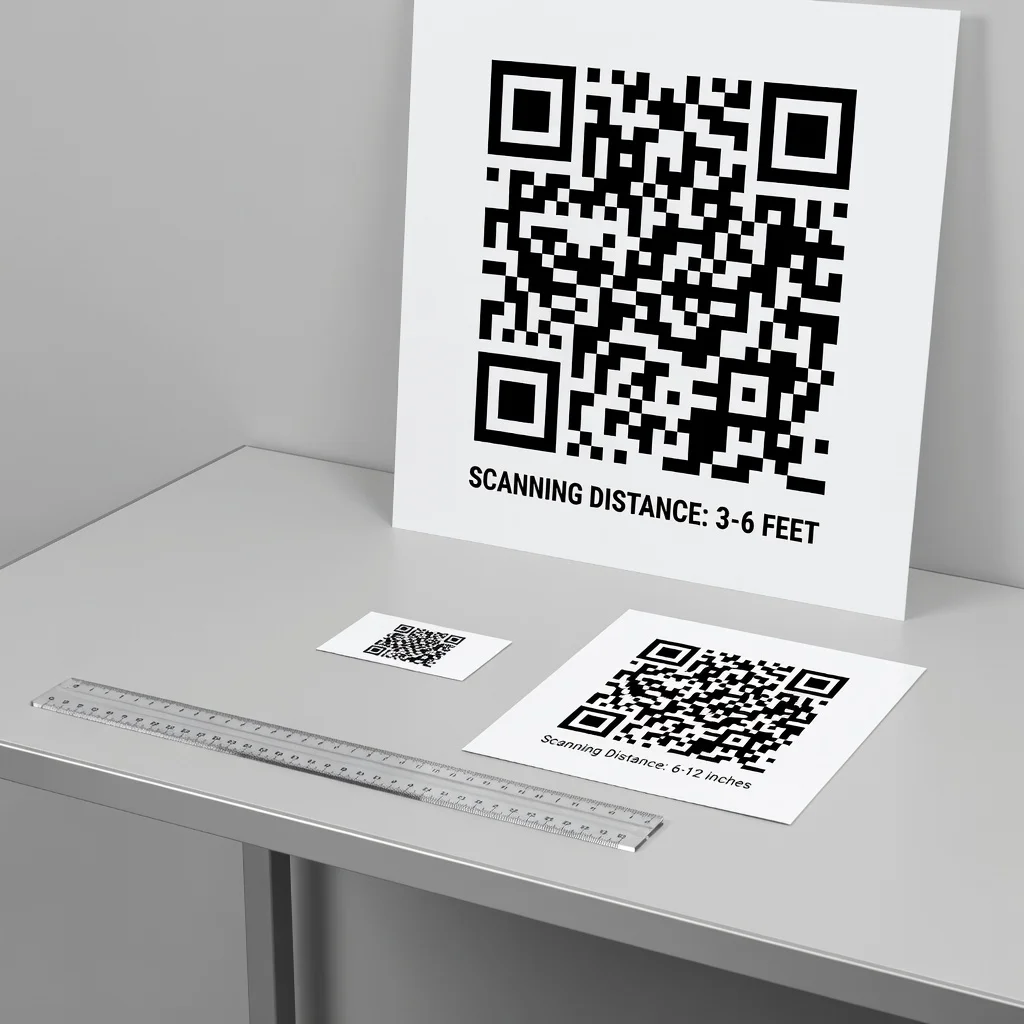
Minimum size for QR codes
Size depends on how close people can get to the code when scanning:
- Business cards and product labels: At least 1 inch by 1 inch (25mm x 25mm). People hold these close to their phones
- Flyers and posters: 2-3 inches by 2-3 inches (50-75mm). People stand a few feet back
- Store window or vehicle: 4-8 inches by 4-8 inches (100-200mm). People scan from 5-10 feet away
- Billboard or large signage: 12+ inches by 12+ inches (300mm+). People might scan from 20+ feet away
The rule: the farther away someone scans from, the bigger your code needs to be.
Resolution: PNG and SVG explained
PNG files: Raster format with fixed resolution. When you download a PNG QR code, it has a set pixel count. A PNG that looks good at 4 inches might look pixelated at 8 inches. PNG is fine for small to medium prints (business cards, flyers) but can struggle with giant prints.
SVG files: Vector format that scales infinitely without losing quality. The code is described mathematically, not pixel-by-pixel. An SVG QR code looks perfect at any size, 1 inch or 100 inches. If you're printing large, SVG is the way to go.
For anything bigger than 4x4 inches, download an SVG version if available. For business cards and small flyers, PNG is fine.
Download resolution: Dpi and file size
When you download your QR code, the generator might offer different size options, like "300px x 300px" or "1200px x 1200px".
Pick the largest available size. Bigger files mean more pixels, which means higher quality when printed. A 1200px PNG looks sharper when printed than a 300px PNG.
For printing, aim for at least 300 DPI (dots per inch). Most modern printers handle this automatically if you download a decent-sized file.
Step-by-step: Preparing a QR code for print
- Generate your code: Create your QR code using any free generator
- Choose format: For large prints (bigger than 4 inches), download SVG. For smaller prints, PNG is fine
- Download the largest size available: Don't pick the small preview option. Get the biggest file the generator offers
- Place it in your document: In your flyer, business card template, or poster design, insert the QR code image
- Size it appropriately: Match your code size to how close people will scan from
- Ensure white space: Leave at least a quarter inch of white space around the code. Don't let text or images touch the edges
- Print test page: Before printing 500 business cards, print one test page and scan the code with your phone
- Confirm contrast: If using colored backgrounds, make sure the code is dark enough to stand out
- Send to print: Once the test page works, print your full batch
Paper, ink, and printing settings
Matte vs. glossy: Both work fine. Matte doesn't have glare, glossy can reflect light. Either way, the print quality matters more than the finish.
Color printing: If you're creating a colored QR code (dark blue on white, for example), make sure your printer can produce the colors you want and that they have enough contrast. Print a test first.
Black and white printing: Simplest and most reliable. Plain black on white works every time.
Printer settings: Use "High Quality" or "Best" settings instead of draft mode. Draft mode saves ink but produces pixelated results.
Common printing mistakes
- Printing too small: A code smaller than 1 inch is frustrating to scan. Go bigger
- Low-quality file: Downloading the smallest preview version and printing it large makes it look pixelated. Download the largest file available
- Touching the code: Text or images touching the edges of the code can prevent scanning. Leave white space
- Low contrast: A light-colored code on a light background, or dark on dark, won't scan. Use opposite colors
- Skipping the test: Don't assume it will work. Print one test page and scan it before printing thousands
- Using old files: If you printed QR codes six months ago and they're not scanning now, the code itself probably expired (if it was dynamic). Static codes never expire
Outdoor printing and weather
If your QR code will be outside, on signage, vehicle wraps, or posters, use weatherproof materials and inks. UV-resistant inks prevent fading, which would reduce contrast and scannability. Laminate or seal printed codes if they'll be exposed to rain.
The bottom line
Printing a QR code right means testing first, sizing appropriately, ensuring contrast, and using high-quality files. Get these right and your code scans perfectly. Skip these steps and it fails. It's not complicated, just a few practical details that make all the difference.
Create your QR code now, print a test page, and make sure it works before sending a big batch to the printer.